Building GUIs with wxPython
Published by Arran Cardnell , Dec. 27, 2017
18 minute read 3 comments 9 likes 23034 views
wxPython is an open source library for easily building Graphical User Interfaces (GUIs) that will work across platforms. wxPython is a wrapper around the popular wxWidgets package, which is a mature cross platform C++ library.
Often when we write scripts in Python we run them through the command line, like so:
python myscript.py
...and generally the output will be printed to the console. Additionally, any inputs that are required by the user are usually prompted through the console as well. This is fine, but it's not very exciting, and if you're building projects that you intend to sell or show off at a job interview, you might need something a bit more impressive.
This is where wxPython comes in. You can build user-friendly, attractive looking GUIs in Python without breaking a sweat. In this tutorial we are going to use wxPython to build a calculator with some very basic operations (i.e. you won't want to be doing your math homework with this one).
Creating a wx.Frame object
Start by installing wxPython:
pip install wxpython
Note: If you are working on Linux and have trouble installing wxPython, you may need the GTK+ and OpenGL libraries installed. Try running the following commands to complete the installation:
sudo apt-get install dpkg-dev build-essential python2.7-dev python3.5-dev python3.6-dev libgstreamer-plugins-base1.0-dev libnotify-dev libwebkitgtk-3.0-dev libwebkit-dev libwebkitgtk-dev libjpeg-dev libtiff-dev libgtk2.0-dev libsdl1.2-dev libgstreamer-plugins-base0.10-dev freeglut3 freeglut3-dev pip install --upgrade --pre -f https://wxpython.org/Phoenix/snapshot-builds/ wxPython
Next, create a script called calculator.py and open it in your IDE. Now add the following code:
1 2 3 4 5 6 7 8 9 10 11 12 13 14 15 | import wx class Interface(wx.Frame): def __init__(self, parent, title): super(Interface, self).__init__(parent, title=title) # Show the window on screen self.Show() if __name__ == '__main__': # Create the application object app = wx.App() Interface(None, title='Calculator') app.MainLoop() |
Don't be alarmed, there's not as much going on here as might first appear. Let's walk through it.
1 | import wx |
First we import wxPython into our script, which brings in core wxPython modules such as windows, boxes and buttons.
3 | class Interface(wx.Frame): |
We create a class called Interface that inherits from the wxPython Frame object. Frame is an important widget used as a container for other widgets. When the Interface object is instantiated on line 13 with its first argument as None, this indicates that the frame has no parent and is the top level widget.
8 | self.show() |
We must then call the show method to display the frame to the screen.
15 | app.MainLoop() |
The final line of our script will run an endless loop that captures all events that occur while the application is running (which for our calculator will include things like button and key presses).
Now if you open your command line, navigate to the folder containing our script, and run the following command:
python calculator.py
...and you will see a very basic window like the one below:
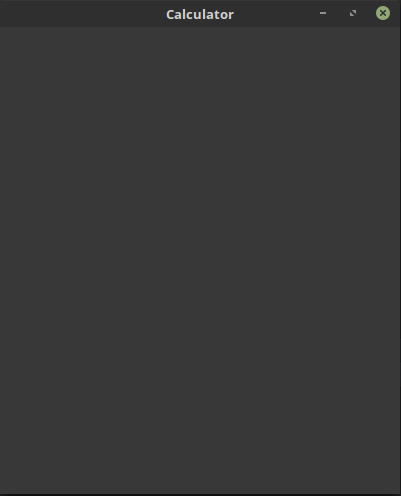
Not exactly mind-blowing, but it's a start. We can control the size of our application by adding a size argument to the super() constructor of __init__:
5 | super(Interface, self).__init__(parent, title=title, size=(300, 400)) |
Here we've specified a width of 300 pixels and a height of 400 pixels.
Let's move on to creating the framework of our calculator.
Layouts and working with wxPython sizers
A typical GUI will need to contain several widgets in order to carry out its intended function. If you consider our calculator application for a minute, we will need several different types of widgets.
We'll need buttons, like '+', '-' and '=', as well as all the number buttons (0-9). We'll need some sort of text output to display the calculation and its result, and we might also need a box where we can manually type in an equation ourselves.
The style and layout of these widgets can easily be controlled in wxPython. Let's start simply by creating a single row with four buttons:
1 2 3 4 5 6 7 8 9 10 11 12 13 14 15 16 17 18 19 20 21 22 23 24 25 26 27 28 29 30 31 32 | import wx class Interface(wx.Frame): def __init__(self, parent, title): super(Interface, self).__init__(parent, title=title) # Show the window on screen self.setup() self.Show() def setup(self): box = wx.BoxSizer(wx.VERTICAL) grid = wx.GridSizer(1, 4, 10, 10) grid.AddMany([ (wx.Button(self, label='+'), 0, wx.EXPAND), (wx.Button(self, label='-'), 0, wx.EXPAND), (wx.Button(self, label='x'), 0, wx.EXPAND), (wx.Button(self, label='/'), 0, wx.EXPAND), ]) box.Add(grid, proportion=1, flag=wx.EXPAND) self.SetSizer(box) if __name__ == '__main__': # Create the application object app = wx.App() Interface(None, title='Calculator') app.MainLoop() |
If you run the python calculator.py command in the console, you should now see something like the image below:
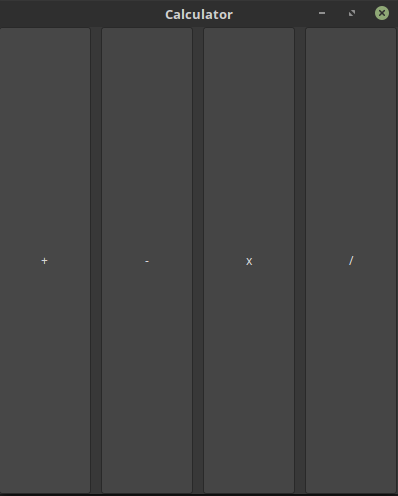
Let's explore what is happening in the code.
9 | self.setup() |
You'll hopefully have noticed that we added a new method called setup, and inside this method you will see we have created two variables called box and grid. These variables are both used to hold wxPython sizer objects, which are used to control the size, positioning and even the resizing of widgets in your application.
12 13 | def setup(self): box = wx.BoxSizer(wx.VERTICAL) |
The box variable is used to hold a wxPython BoxSizer object. This sizer allows us to put numerous other widgets or sizers into rows and columns. Here we've supplied the argument for BoxSizer with wx.Vertical, which specifies that we want the orientation to be vertical.
14 | grid = wx.GridSizer(1, 4, 10, 10) |
The grid variable holds a GridSizer object. The GridSizer object sets out rows and columns in a table format, with each cell inside the table being the same size. The GridSizer object takes four arguments: rows, columns, vertical gap and horizontal gap. So here we have specified that we want 1 row, 4 columns and vertical/horizontal space of 10 pixels.
Next, we've added four buttons to the GridSizer row:
16 17 18 19 20 21 | grid.AddMany([ (wx.Button(self, label='+'), 0, wx.EXPAND), (wx.Button(self, label='-'), 0, wx.EXPAND), (wx.Button(self, label='x'), 0, wx.EXPAND), (wx.Button(self, label='/'), 0, wx.EXPAND) ]) |
To add multiple widgets to a sizer at once, you can use the AddMany() method. The widgets will be added in the order they appear, filling up the first row, then the second, and so on.
We've used the built-in wx.Button object to create our four buttons and given them each a specific label to display on the button.
The 0 defines the proportion flag. This flag defines the scale of a widget along the axis of its orientation. So if we add widgets with a proportion flag greater than 0 to a BoxSizer that has horizontal alignment, then the widgets will scale along the horizontal axis. A widget with a proportion of 2 will be scaled to twice the size of a widget with a proportion of 1, whilst a widget with a proportion of 0 will not be scaled. The proportion flag is not used for a GridSizer like our calculator because the cells of the table are all created with equal size.
The wx.EXPAND flag tells the widget to use all the space along the other axis. So adding a widget with the wx.EXPAND flag to a BoxSizer that has horizontal alignment will expand the items on the vertical axis.
23 24 | box.Add(grid, proportion=1, flag=wx.EXPAND) self.SetSizer(box) |
Finally, we add the GridSizer to our vertically aligned BoxSizer and tell it to expand to fill all the available space.
Now that we understand how the GridSizer defines rows, columns and cells, we can add the remaining buttons we need to our calculator. Start by changing the GridSizer to have four rows:
14 | grid = wx.GridSizer(4, 4, 10, 10) |
...and then populate the rows with the following:
16 17 18 19 20 21 22 23 24 25 26 27 28 29 30 31 32 33 | grid.AddMany([ (wx.Button(self, label='7'), 0, wx.EXPAND), (wx.Button(self, label='8'), 0, wx.EXPAND), (wx.Button(self, label='9'), 0, wx.EXPAND), (wx.Button(self, label='/'), 0, wx.EXPAND), (wx.Button(self, label='4'), 0, wx.EXPAND), (wx.Button(self, label='5'), 0, wx.EXPAND), (wx.Button(self, label='6'), 0, wx.EXPAND), (wx.Button(self, label='*'), 0, wx.EXPAND), (wx.Button(self, label='1'), 0, wx.EXPAND), (wx.Button(self, label='2'), 0, wx.EXPAND), (wx.Button(self, label='3'), 0, wx.EXPAND), (wx.Button(self, label='-'), 0, wx.EXPAND), (wx.Button(self, label='0'), 0, wx.EXPAND), (wx.Button(self, label='.'), 0, wx.EXPAND), (wx.Button(self, label='='), 0, wx.EXPAND), (wx.Button(self, label='+'), 0, wx.EXPAND) ]) |
If you run python calculator.py in the console you should now have an application that looks remarkably like a calculator! Unfortunately it's not quite ready to start calculating your tips with yet, but we can fix that.
Binding wxPython Events to Buttons
The next step is for us to bind an event to each of the buttons above so that they can perform an action based on their label. Events are an integral part of GUI applications that allow them to react to different types of actions. Events include things like pressing a key on the keyboard, moving the mouse or clicking a button.
Above we discussed the fact that the line app.MainLoop() created our event loop. This event loop is now waiting for us to trigger an event by clicking one of our buttons. But before the event loop can capture our events, we need to actually bind an event type to our buttons.
To do this, we are actually going to refactor our code slightly. If you are unfamiliar with the term refactor, it simply means we are going to restructure our code without changing the way it is already functioning, i.e. we are going to bind events to our buttons without changing the layout of our calculator.
We're going to refactor the code:
14 15 16 17 18 19 20 | grid = wx.GridSizer(4, 4, 10, 10) grid.AddMany([ (wx.Button(self, label='7'), 0, wx.EXPAND), (wx.Button(self, label='8'), 0, wx.EXPAND), ... ]) |
...to look like the following:
14 15 16 17 18 19 20 21 22 23 24 25 26 27 | grid = wx.GridSizer(5, 4, 10, 10) buttons = [ '7', '8', '9', '/', '4', '5', '6', '*', '1', '2', '3', '-', '0', '.', 'C', '+', '=' ] for label in buttons: button = wx.Button(self, -1, label) grid.Add(button, 0, wx.EXPAND) self.Bind(wx.EVT_BUTTON, self.on_button_press, button) |
Essentially, we have replaced the AddMany() method with a for loop that cycles through our button labels and creates a button widget with the corresponding label. The button is then added to the GridSizer, and then we bind the wxPython button press event, i.e. wx.EVT_BUTTON, to the button.
We could have created the same functionality without a for loop, but we would have had to create and bind each button manually. By refactoring our code, not only have we shortened it and improved its readability, we have also improved its maintainability. Now if you want to add an extra button to your calculator, all you need to do is add the label to the buttons list.
Coding our Event Handler
You should now have a calculator with several buttons, but there is one key element missing, and that's a display for our input/output. We can fix that quickly by adding a wxPython TextCtrl as follows:
13 14 15 | box = wx.BoxSizer(wx.VERTICAL) self.textbox = wx.TextCtrl(self, style=wx.TE_RIGHT) box.Add(self.textbox, flag=wx.EXPAND | wx.TOP | wx.BOTTOM, border=4) |
Your code should now look like this:
1 2 3 4 5 6 7 8 9 10 11 12 13 14 15 16 17 18 19 20 21 22 23 24 25 26 27 28 29 30 31 32 33 34 35 36 37 38 39 40 | import wx class Interface(wx.Frame): def __init__(self, parent, title): super(Interface, self).__init__(parent, title=title, size=(300, 400)) # Show the window on screen self.setup() self.Show() def setup(self): box = wx.BoxSizer(wx.VERTICAL) self.textbox = wx.TextCtrl(self, style=wx.TE_RIGHT) box.Add(self.textbox, flag=wx.EXPAND | wx.TOP | wx.BOTTOM, border=4) grid = wx.GridSizer(5, 4, 10, 10) buttons = [ '7', '8', '9', '/', '4', '5', '6', '*', '1', '2', '3', '-', '0', '.', 'C', '+', '=' ] for label in buttons: button = wx.Button(self, -1, label) grid.Add(button, 0, wx.EXPAND) self.Bind(wx.EVT_BUTTON, self.on_button_press, button) box.Add(grid, proportion=1, flag=wx.EXPAND) self.SetSizer(box) if __name__ == '__main__': # Create the application object app = wx.App() Interface(None, title='Calculator') app.MainLoop() |
We have now bound each of our button presses to a function called on_button_press. This function is known as an event handler, as it contains the code responsible for reacting to an event. Therefore we need to code our on_button_press event handler to react to...well...a button press.
Create a new method after the setup method called on_button_press and add the following code:
35 36 37 38 39 40 41 42 43 44 45 46 47 48 49 50 51 52 53 54 55 56 57 | def on_button_press(self, e): # Get label of button label = e.GetEventObject().GetLabel() # Get the input from the TextCtrl calculation = self.textbox.GetValue() # Handle the event based on the button pressed if label == '=': # Calculate the result of the input in the TextCtrl # Ignore an empty calculation if not calculation: return result = eval(calculation) # Show the result self.textbox.SetValue(str(result)) elif label == 'C': # Clear the TextCtrl self.textbox.SetValue('') else: # 0-9 (and .) # Add the label of the button press to the current calculation in the TextCtrl self.textbox.SetValue(calculation + label) |
With this function in place, our calculator will now be able to react to button presses and calculate the result of the input. If you run the python calculator.py command in the console, you should now see something like the image below:
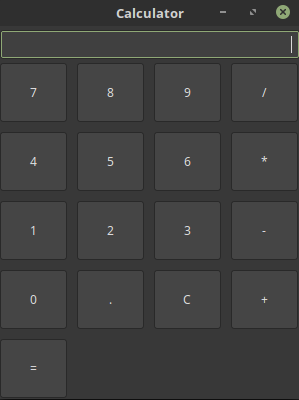
The buttons will now react to click events to calculate the results of expressions. Again, let's walk through how the code is doing this.
35 36 37 38 | def on_button_press(self, e): # Get label of button label = e.GetEventObject().GetLabel() |
The on_button_press method is defined and is passed the event object for the button that is pressed. We use this event object to get the label of the button ('9', 'C', '=', etc).
41 | calculation = self.textbox.GetValue() |
We then also grab the current input from the TextCtrl and assign it to the variable calculation.
44 | if label == '=': |
If the equals button is pressed, we need to calculate the result of the current input displayed in the TextCtrl stored in calculation.
46 47 | if not calculation: return |
If the input is empty (and therefore there is nothing to calculate), we can simply end the function with return.
49 | result = eval(calculation) |
On the other hand, if theTextCtrl is not empty, then we need to calculate the result and display it. Luckily, Python has a very useful and powerful function built in called eval. eval can interpret a string as code and return the result. So we can pass the eval function strings such as '2 x 3' and '10 - 5' and it will return 6 and 5 for us. This saves us from having to create a lot of code ourselves.
Note: Take care when using the
evalmethod.evalwill execute any valid Python code it is given, so you should avoid ever combining it with user input to prevent someone potentially running malicious code through your application.
52 | self.textbox.SetValue(str(result)) |
Once the input has been evaluated the result is set as the value of the TextCtrl.
53 54 | elif label == 'C': # Clear the TextCtrl self.textbox.SetValue('') |
If the clear button is pressed, the value of the TextCtrl is set to an empty string.
55 56 57 | else: # 0-9 (and .) # Add the label of the button press to the current calculation in the TextCtrl self.textbox.SetValue(calculation + label) |
Finally, if anything other than the equals or clear buttons are pressed, i.e. 0-9 or the decimal point, then the label of the button is added to the current calculation in the TextCtrl.
Dialogs and handling exceptions
The calculator now works pretty much as you might expect, but there is one last thing we really need to take care of. If the user inputs an invalid calculation, like 2 -+ 3 or 2 * Penguin, Python will raise an exception. We can catch these exceptions with try / except and use this to return a message to the user so they can correct their mistake. We can do this using dialogs.
Dialogs are a part of GUIs that are used to communicate information between the user and the application. wxPython has several built-in dialogs that we can use to display messages to the user.
Let's refactor our on_button_press method with a try / exceptblock to catch any input errors, and use the built-in dialog wx.LogErrorto convey the errors to the user. Replace the line result = eval(calculation) with the following code:
49 50 51 52 53 54 55 56 57 | try: # Calculate the result result = eval(calculation) except SyntaxError as err: # Catch any input errors (e.g. '6 +* 2') wx.LogError('Invalid syntax ({}). Please check your input and try again.'.format(calculation)) return except NameError as err: # Catch any manually typed errors (e.g. '2 x three') wx.LogError('There was a error. Please check your input and try again.') return |
We add try before the eval method, which is where we will encounter any exceptions if the calculation is invalid.
52 53 54 | except SyntaxError as err: # Catch any input errors (e.g. '6 +* 2') wx.LogError('Invalid syntax ({}). Please check your input and try again.'.format(calculation)) return |
We use a SyntaxError exception to catch any mistakes with the format of the operators, such as combining add and subtract. If this type of exception is raised, a LogError dialog is used to inform the user of the issue.
55 56 57 | except NameError as err: # Catch any manually typed errors (e.g. '2 x three') wx.LogError('There was a error. Please check your input and try again.') return |
We also use a NameError exception to catch any unexpected input, which the user might have tried typing into the TextCtrl manually. You might think 2 * Penguin should return two penguins, but unfortunately the eval method just isn't that sophisticated.
And there we have it; a fully working calculator! The full script should look like the following:
1 2 3 4 5 6 7 8 9 10 11 12 13 14 15 16 17 18 19 20 21 22 23 24 25 26 27 28 29 30 31 32 33 34 35 36 37 38 39 40 41 42 43 44 45 46 47 48 49 50 51 52 53 54 55 56 57 58 59 60 61 62 63 64 65 66 67 68 69 70 71 72 73 | import wx class Interface(wx.Frame): def __init__(self, parent, title): super(Interface, self).__init__(parent, title=title, size=(300, 400)) # Show the window on screen self.setup() self.Show() def setup(self): box = wx.BoxSizer(wx.VERTICAL) self.textbox = wx.TextCtrl(self, style=wx.TE_RIGHT) box.Add(self.textbox, flag=wx.EXPAND | wx.TOP | wx.BOTTOM, border=4) grid = wx.GridSizer(5, 4, 10, 10) buttons = [ '7', '8', '9', '/', '4', '5', '6', '*', '1', '2', '3', '-', '0', '.', 'C', '+', '=' ] for label in buttons: button = wx.Button(self, -1, label) grid.Add(button, 0, wx.EXPAND) self.Bind(wx.EVT_BUTTON, self.on_button_press, button) box.Add(grid, proportion=1, flag=wx.EXPAND) self.SetSizer(box) def on_button_press(self, e): # Get label of button label = e.GetEventObject().GetLabel() # Get the input from the TextCtrl calculation = self.textbox.GetValue() # Handle the event based on the button pressed if label == '=': # Calculate the result of the input in the TextCtrl # Ignore an empty calculation if not calculation: return try: # Calculate the result result = eval(calculation) except SyntaxError as err: # Catch any input errors (e.g. '6 +* 2') wx.LogError('Invalid syntax ({}). Please check your input and try again.'.format(calculation)) return except NameError as err: # Catch any manually typed errors (e.g. '2 x three') wx.LogError('There was a error. Please check your input and try again.') return # Show the result self.textbox.SetValue(str(result)) elif label == 'C': # Clear the TextCtrl self.textbox.SetValue('') else: # 0-9 (and .) # Add the label of the button press to the current calculation in the TextCtrl self.textbox.SetValue(calculation + label) if __name__ == '__main__': # Create the application object app = wx.App() Interface(None, title='Calculator') app.MainLoop() |
What to do next
We've barely scratched the surface of what wxPython is capable of. wxPython has the power to build GUIs for applications like File Managers, Games, or even Browsers. Just as you have hopefully seen in this tutorial, wxPython provides plenty of useful built-in tools to make the process of building GUIs super easy. Try creating your own GUIs and post your work in the comments. I'd love to see what you come up with!